Making my home 2% smarter – Part 4
Now that we have some easy access to our configuration files, it’s time to start deciding what we can do with this home assistant hub. As I mentioned before, I have a lack of Z-Wave or other automation devices for my home, so tinkering with automation jobs like that seems like a wash. However, one thing I do have is a Raspberry Sense HAT. If you’ve never seen one of these things, it is a simple, all-in-one sensor board. It can be useful for testing programs that may make use of a temperature sensor rather than having to prototype a board yourself with individual sensors. Bonus is that the Home Assistant program also has a pre-built component for it!
Installing the HAT
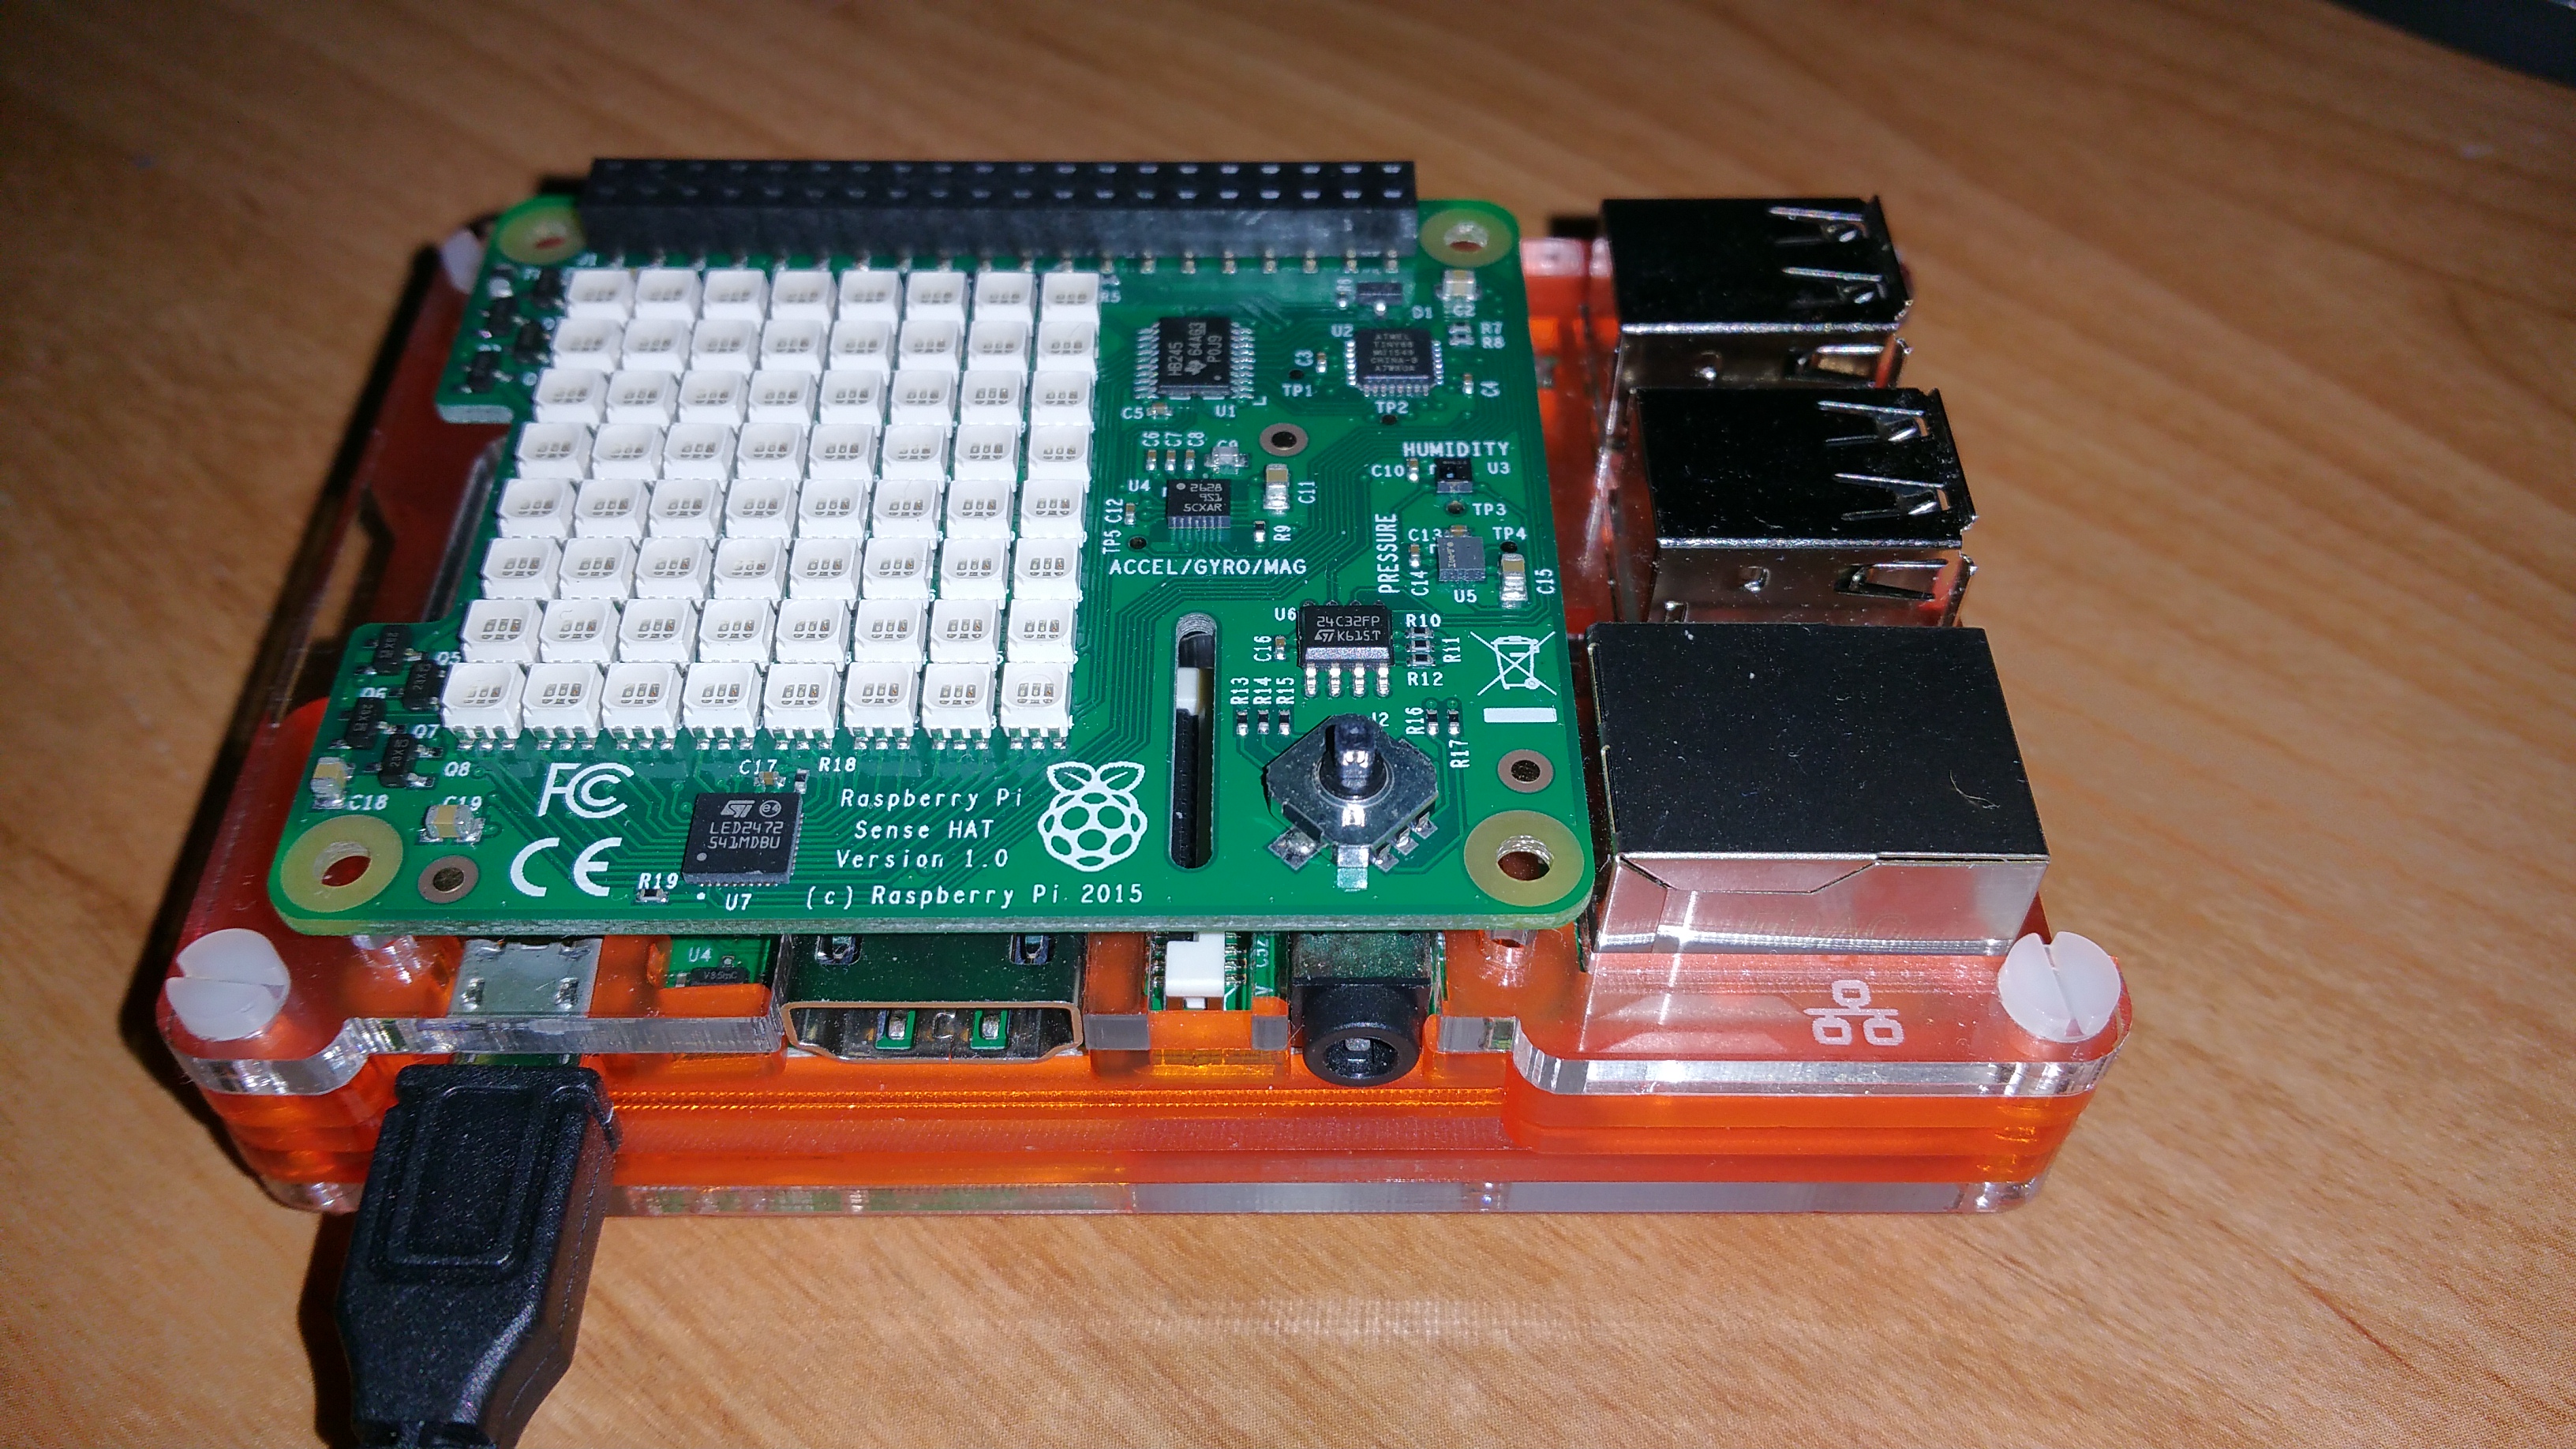
Installation of the Sense HAT is fairly easy, though as a consequence of its design, it will cover all 40 pins of a Raspberry Pi’s GPIO connector. Does it use them all? Can it pass through and allow other HATs on top? I don’t know, and the documentation hasn’t been forthcoming with that information. I had guessed the I2C interface, and finding this pinout diagram shows me that I was right. It even hints at the possibility of pass-through usage of the other pins.
At any rate, in my case (as shown above), I had a case that exposed the GPIO connector. Plastic standoff posts and screws come with the Sense HAT, so mounting it right onto the Pi’s board is easy enough. My case doesn’t allow me to do that, as its structure relies on the top plate to be in place. Additionally, the sensors don’t work as well covered, so I opted to leave the board mounted by the GPIO connector alone and stand above the case. It works. For a permanent solution, I wouldn’t recommend this as it leaves the delicate sensor chips open to exposure, but it works in a pinch and lets me get started.
Installing the Software
Installing the software was more of a challenge for me. The Sense HAT Component Page details some steps to go through in order to install the software. Parts of it wound up being helpful, but I wound up suffering some problems that no readily documented resolution was available for. I made mistakes at first, being given the information on what to install incompletely. Python, the language that Home Assistant is written in, supports something called ‘virtual environments’. My take on it is that it is a non-global repository of source files. I didn’t realize this, nor how to work with it, so my first attempt had me install the Sense HAT components in the global repository. This did not work well. Keep in mind that I was working off of the Hassbian 1.1 image. The deployment requirements for the All-In-One Installer script may (and likely is) different.
To get into the virtual environment to perform the install properly, as documented on the Component page, the commands are:
pi@hassbian$ sudo su -s /bin/bash homeassistant
homeassistant@hassbian$ source /srv/homeassistant/homeassistant_venv/bin/activate
(homeassistant) homeassistant@hassbian$
When you get the prefix on your prompt of (homeassistant) that should be a good indicator you’re in the right spot. Once you are, you should be able to install the Sense HAT libraries using:
(homeassistant) homeassistant@hassbian$ pip3 install sense-hat
This ended badly. At first, it complained about missing components during the install. One component was resolved by, as the pi user, installing the appropriate library.
pi@hassbian$ sudo apt-get install libjpeg-dev
That solved one problem, getting the Sense HAT software installed in the virtual dev. The second problem came about because I could not install the second bit, the RTIMU library. This is supposed to be done as the pi user as well, but as it doesn’t work well system wide without a binary library involved, more steps are needed. First out of the gate, though, was the inability to actually install the library as instructed. Research led me to another user on the forum having the same issue as I was.
Since I resorted to apt-get to install the libjpeg-dev library system-wide and the python library for RTIMU could not be gotten through pip, I hazarded a guess that maybe it could be gotten through the apt repository too. Sure enough, it was.
pi@hassbian$ sudo apt-get install python3-rtimulib
This was step one. Step two was slightly wrong as well, and I linked the library to where it needed to be. In this case, I was as the homeassistant user, as it had the rights to the virtual environment.
homeassistant@hassbian$ ln -s /usr/lib/python3/dist-packages/RTIMU.cpython-34m-arm-linux-gnueabihf.so /srv/homeassistant/lib/python3.4/site-packages/
For good measure, I went ahead and added the homeassistant user to the input group so it could read the input of the joystick (even if it isn’t strictly supported).
pi@hassbian$ sudo addgroup homeassistant input
After that was complete, and performing a reboot, I was able to continue on to configuring the Sense HAT in Home Assistant.
Configuring Home Assistant
Now that the software installed and available for Home Assistant to read the sensor data, it’s time to configure the sensors within Home Assistant. This is fairly well documented, and I followed the steps on the Component page once more, adding in my configuration.yaml file the following:
sensor:
  - platform: sensehat
    display_options:
        - temperature
        - humidity
        - pressure
One somewhat important thing to note is that, if you have other sensors, you may have to change the sensor: line to have a name associated with it, such as sensor 2: as this will help distinguish the second block from the first.
What this block of configuration does is first, to bring in the Sense HAT sensors of temperature, humidity, and pressure. This is the first section of data where it starts with platform: sensehat and continues with the display options. This will create sensor entities within the system called sensor.temperature, sensor.pressure, sensor.humidity. These sensors will be displayed in the web page as ‘badges’ at the top and have a great number of decimal places. Useful, but it isn’t exactly what I want.
Templates for Pretty Display
Suggested in the same block on the Component page is the use of display templates. This is supposed to take values from a sensor and make them more readable. In this case, the following block is suggested.
  - platform: template
    sensors:
      sensehat_temperature:
        value_template: '{{ states.sensor.temperature.state | round(1) }}'
        unit_of_measurement: '°C'
      sensehat_pressure:
        value_template: '{{ states.sensor.pressure.state | round(1) }}'
        unit_of_measurement: 'mb'
      sensehat_humidity:
        value_template: '{{ states.sensor.humidity.state | round(1) }}'
        unit_of_measurement: '%'
What this does is to take the sensors that are on coming directly off the Sense HAT and makes them friendlier. It also gives them a defined unit. One thing I noticed, however, is that when I changed the unit above from degrees C to degrees F, it attempted to automatically perform some conversion on the value, giving me some interesting readings of 150+ degrees. These template sensors will not show up by themselves, like the normal sensor badges will. In order to make them show up, what we can do is add them to a group. Again, the sample configuration from the Component page demonstrates.
group:
  sense_hat:
    name: Sense HAT (Family Room)
    entities:
      - sensor.sensehat_temperature
      - sensor.sensehat_humidity
      - sensor.sensehat_pressure
What this does is to create a card (one of the white box entities on the page) that will contain the template sensors, assigned by their entity IDs. For now, this will do, and the group now shows up on the main page with the sensors we defined and the name we gave it. We can do one more thing in order to make this pretty, and that is add friendly names and icons for them. We can do that with the following section under customize:
# Example configuration.yaml entry
customize:
  sensor.sensehat_temperature:
    icon: mdi:thermometer
    friendly_name: "Temperature"
  sensor.sensehat_humidity:
    icon: mdi:weather-rainy
    friendly_name: "Humidity"
  sensor.sensehat_pressure:
    icon: mdi:gauge
    friendly_name: "Pressure"
That done, when we look at the result, we get what we see below.
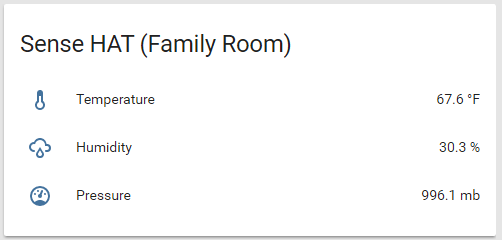
Looking good.